After making one of the most important decision in my life so far – to pursuit a career that closely related to Computer Science and Software Engineering, I knew that I will be spending a lot of time working with computer. This in turn means that I will be interacting with the peripherals and devices that act as the input and output for computer, such as keyboard, mouse, monitor, etc.
For me, health and physicality comes first. That’s why I’m very aware about my working posture, and watched many YouTube videos about how to sit properly in a working environment.
Posture
It is scientifically proven that sitting for a long period of time is not good for one’s health, so I got myself a standing desk. It’s a fairly basic one sold by a local furniture store near where I live. I use the pomodoro timer on my smartwatch and set it to automatically start when it detected that I’m in sitting position. This helps me to remember to alternate between standing and sitting every 1 hour. Some people online said that standing position caused them to be distracted from their work, but I personally found that is not true. I can still be able to study and work normally in both position without noticing any significant changes.
I don’t have an ergonomic chair, just a regular coffee shop style wooden chair with a removable seat cushion I bought online. It’s cheap, simple, sturdy and reliable. The comfort is definitely not the best, but that’s not really a drawback for me since that will remind me to stand up whenever the discomfort kicked in.
For the monitor, I use a Dell 27″ FullHD screen. I got it since it supports 3 types of video input (DP, HDMI, VGA) and has a built-in USB 3.0 hub. I positioned the screen so that it is 1 arm length away from me, and the top edge of the screen will be in the middle of the field of view of my eye when I look straight ahead. This ensures that when I’m in correct posture, my eyes will mostly looking down, which helps to:
- Minimize the exposed surface area of my eyes and in turns helped them to stay moist for longer
- Make the muscles that move the eyeballs stay closer to their relaxed position
- Reduce neck strain
I have been able to work for an extended period of time without feeling strain or sore in by torso, shoulders and neck for the last 3 years using this setup.
Typing
The most common activities working with computer are using the keyboard and using the mouse. Keyboard, for the longest time, has been notoriously criticized by people who have some knowledge about ergonomics. Both the key layout (QWERTY) and physical layout (staggered) of conventional keyboards are the left-overs of a bygone era, but since they were adopted so widely, most people stayed with them to this day.
Compared to other keyboard layouts, QWERTY almost always come out as the worst performer when used for typing English. The following pictures are the heatmaps produced by typing most common English words on the respective layout:


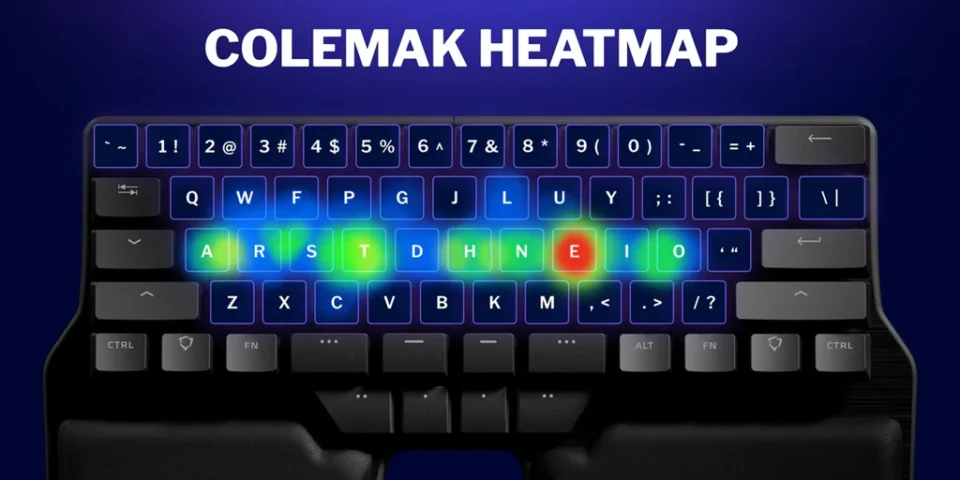


QWERTY is all over the place! Since our fingers are supposed to rest on the “home row” keys (keys that are one the middle row of the alphabetic area), a lot of movement outside this row will caused strain and sore. That’s why I switched to Colemak layout primarily for the last 3 years and never looked back. I felt so much better using this layout, and can immediately feel the awkwardness whenever I have to go back and use QWERTY.
Why Colemak?
I am a keyboard shortcut oriented computer user. I prefer my hands stay on the keyboard instead of moving over to use a mouse, so I try my best to avoid doing so. The 4 universally defined keyboard shortcuts are: Ctrl+Z, X, C and V. This is the only reason why I chose this layout over other options.
Colemak is based on QWERTY, and aimed to be more friendly and easy to transferred to from QWERTY [source]. And I can say that their claim is quite true! I used Monkeytype to practice typing with the Colemak layout. The big dip is when I change to Colemak, and before that was me practicing touch typing on QWERTY. In the span of only 1 month, I managed to reach 40 word-per-minute on average on Colemak! Of course, I did this during my summer break, so I got plenty of free time and practiced almost all days.

around the time I started transitioned to Colemak
One of the most life-changing thing when I started using this layout is that it swap the position of Caps Lock and Backspace key! Now I don’t have to lift my right hand up whenever I need to press backspace. It make tons of sense and feel so comfortable.
However, by using a conventional keyboard, my arms, wrists and hands are still not in the most relaxed position, applying a lot of strains onto my muscles. This caused me to constantly feel very sore in my arms when typing for an extended period of time, and over time the pain started to kick in sooner and sooner. That was when I realized that something must be changed with my typing position.
Ergonomic keyboard
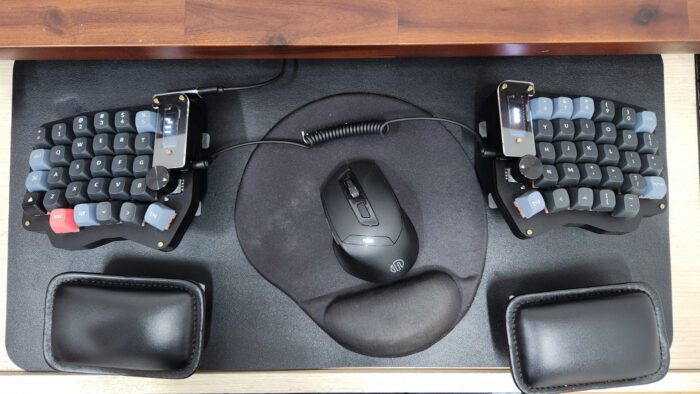
After some extensive research online, I found out that a split, ortholinear keyboard is the way to go. They help me to position each half freely so that my arm stayed on the same vertical plane as my shoulder, help me to open up my chest. The ortholinear will match better with the movement range of fingers, and since it is a split keyboard, the orientation can be adjust freely to best match my fingers’ movement.
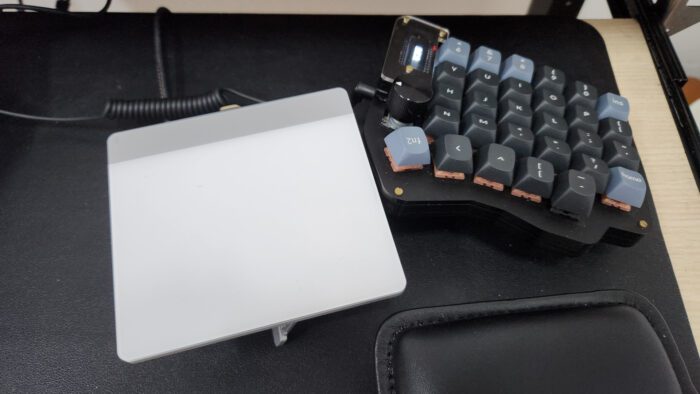
I decided to go with the Sofle v1 layout, designed by Josef Adamcik. The only reason for this is that this is the only layout that I can buy in my city and is relatively cheap, cost me only $100 for the base kit. It has plenty of keys and has microcontrollers that I can flash QMK firmware on, which extends the functionality and longevity of the board. The two halves are connected using a normal 3.5-to-3.5mm jack cable, which is very easy to find.
At first, I thought that changing from staggered to columnar layout will take some times to adjust. But to my surprise, I immediately familiarized myself with it and typed as I usually do. I can seamlessly switch between typing on this keyboard and my laptop keyboard without any hiccups. The only thing that I had to adjust was to keep in mind that I have to press the “B” key using my left index finger, which is also the more correct way to do it.
You might notice that the keycaps are in QWERTY layout. That is because I prefer to use a sculpted keycap profile, thus the keycaps have to stay in their original intended position. Furthermore, since I touch type, what is shown on the keyboard doesn’t bother me. The keycap that I used here was taken from my Keychron V2, and felt really good to type on.
Since I will bring this keyboard with me to school and work, I want to use silent switches. After trying out 5 different budget and readily available options, I settled on the Akko Haze Pink, and changed the stock 45g spring to the ones with 35g actuation. This made a massive difference in the typing experience for me as a light typist.
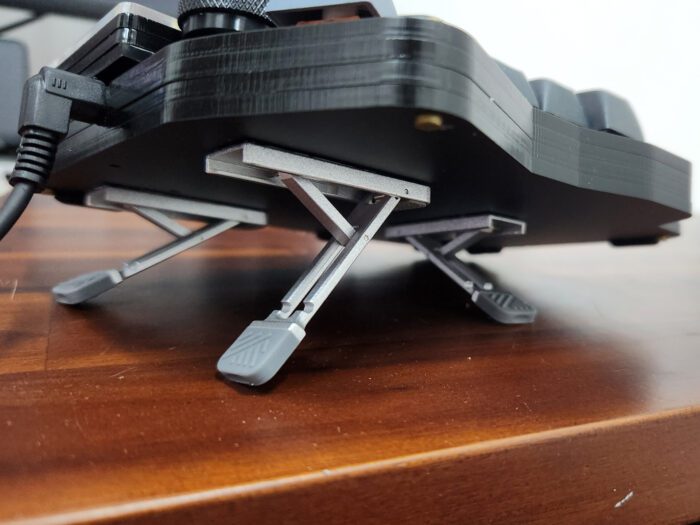
Since the keyboard did not came with a tenting kit, I added it myself using some simple kickstands I bought online. They are placed in a way that I can achieve multiple tenting options by adjusting the notch on each of the 3 kickstands appropriately. I also stick on some laptop feet rubber pieces to increase grip in different tenting positions.
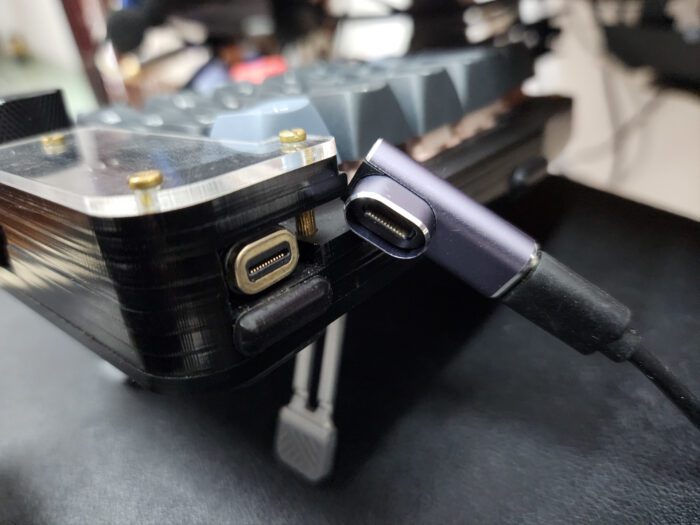
This keyboard use wired connection to operate by connecting to one of the two microcontrollers’ USB port. However, due to my concern about the durability of the USB ports on these boards, I used a magnetic connector plug to mitigate the risk of damaging the port by plugging and unplugging directly. This connection is also weaker than plugging in directly, but this also help preventing the connector to be damaged in case the keyboard fell down or ripped out unexpectedly. The connector that I used here will forward the USB signal directly without any processing, so raw data to and from the board is preserve and I’m able to flash the firmware with them on.
Pointing devices
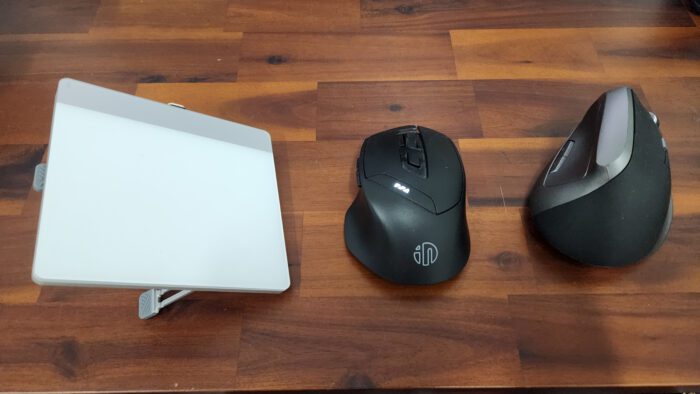
I have 3 pointing devices: normal, vertical and touchpad. I mostly use the normal mouse for daily tasks and gaming, touchpad when I’m coding or writing documents, and the vertical mouse for using with my phone when I’m lying in bed. All 3 of them are silent and utilize wireless connection so that I can swap them quickly and easily.
The touchpad also has its own kickstands so that it can be at the same height with my keyboard when elevated for ease of usage.